# Creating an Event
Before you can create and issue tickets, you must first create a corresponding event.
{% hint style="info" %}
Event creators are limited to creating 2 events. If you’d like to create more than 2 events, please contact us via [email.](mailto:support@moongate.id)
{% endhint %}
1. **Register your event**
Sign into the [Moongate Merchant Portal](https://portal.moongate.id/), open the [‘Event’ tab](https://portal.moongate.id/events), and click ‘Create’.
2. **Add basic information for your event**
Enter the name of your event, starting & ending dates/times, address, etc.
{% hint style="warning" %}
While you can edit most of this information even after your event goes live, your event’s URL **cannot be changed after publication.** Be sure to double-check it before publication.
{% endhint %}
When you are ready, scroll to the end of the page and click ‘Next’.
{% hint style="info" %}
Tip: Clicking “Next” will save your work. You can also click “Save Draft” at any point to save your work and return to it later.
{% endhint %}
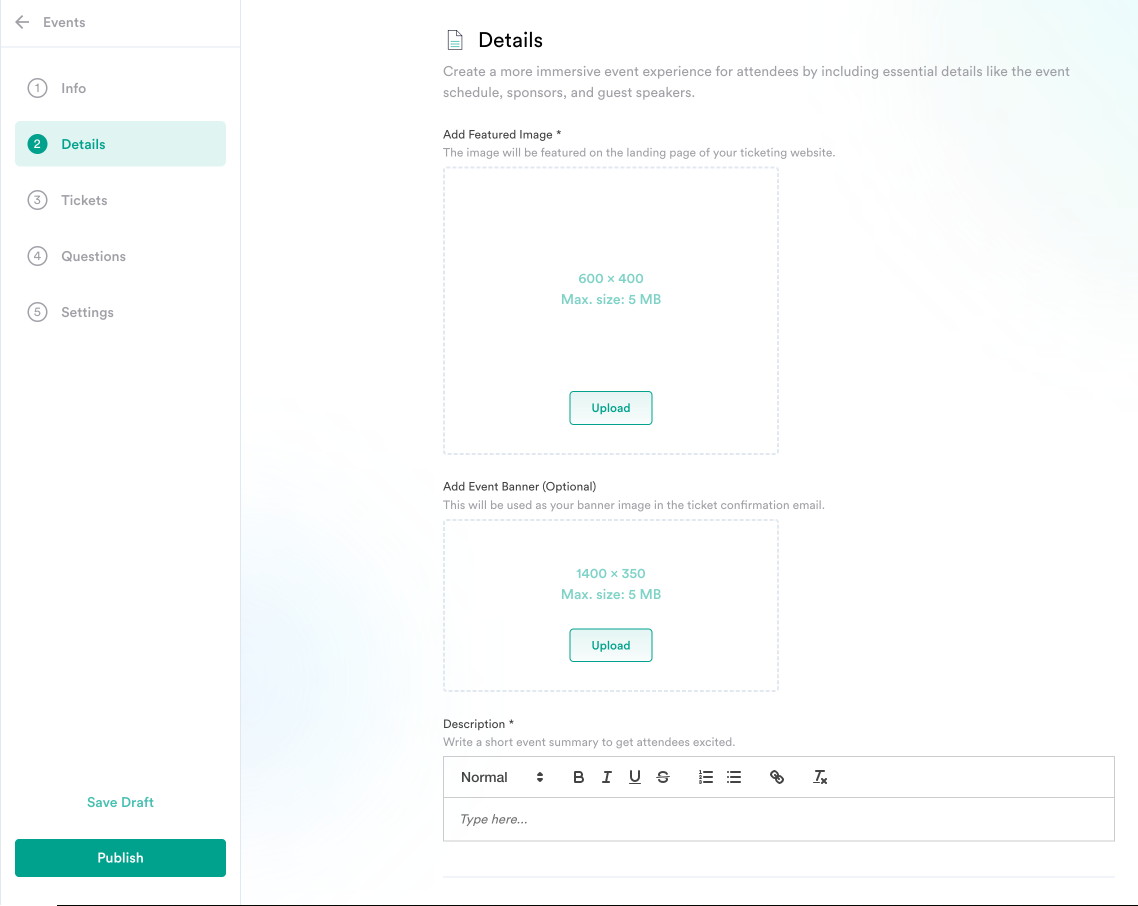
3. **Fill out the details of your event**\
\
Add a featured image, event banner, and description of your event, as well as links to relevant social media accounts.
{% tabs %}
{% tab title="Featured Image" %}
Where customers will see links to website/social media accounts
{% endtab %}
{% endtabs %}
When you are ready, scroll to the end of the page and click 'Next'. You are now ready to [create tickets](https://moongate.gitbook.io/moongate-merchant-user-guide/merchant-guide/creating-a-campaign/ticketing/creating-tickets)!